Have you been wondering if you can make DIY concrete countertops? If so you have come to the right place as I am going to show you how!
DIY Concrete Countertops
Kitchen remodeling is a very expensive thing to do and countertops are a good chunk of the cost. If you want to save that expense and cut it way down, pouring your own DIY concrete countertops is a great way to go.
You can now buy colored sealers to go on the top too, so there are a lot of options for the finish. Sometimes you have to just jump in and do it yourself to tweak things the way you like them.
In this case, that is what has happened, so we are sharing what we have found works well and turns out to be a good, solid countertop for a minimal expense.
I am going to give you a list of the supplies you will need, and then a run-down of how we built our own and finished them off.
Keep in mind that I am not giving you amounts of the supplies, only an estimate, because your counters will be different shapes and sizes and some of this will need to be customized to your house, and your preferences.
After you learn how to DIY Concrete Countertops, here are a few other DIY’s you might like.
- DIY Pallet Wall Project
- Frugal DIY Bathroom Remodel
- DIY Water Heater Repair – How To Change Heating Elements
- How To Patch Drywall
- How To Flush Hot Water Heater – Electric Hot Water Heater
Supplies Needed:
- Plywood for base and sides of counters
- Chicken or dog wire, cut to fit tops of counter
- 2 bags Quick crete cement mix per 5 ft. of counter space (Approximately)
- Trowel for smoothing
- Screws
- Plastic sheeting
- Palm sander
- Concrete leveler
- Concrete & Garage sealer epoxy
How To Make Countertops:
The base and edging of each counter is made out of plywood, making a rim around the edge to hold in the concrete and a lip around the bottom so that the counter has a nice finish that hangs over.
Our lip was framed in so that it made a 2” lip, and the counter is 1” deep throughout, other than the lip.
The deeper you make the countertop, the longer it will take to dry and the harder it is to keep it drying at a consistent rate and avoid any cracks.
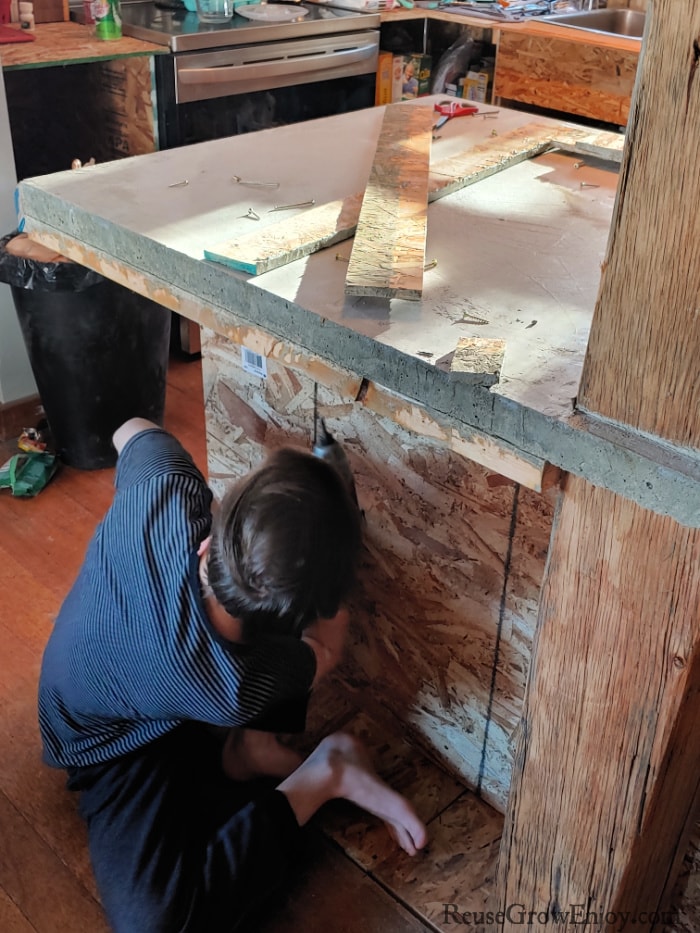
Get your plywood base and edging built and then attach it to the cabinets or whatever base you are using. Ours is wooden and so it was just a matter of screwing them on the top.
Also, if you are pouring around a sink, you will need to cover it and tape it off to keep the concrete from setting up anywhere on or in it.
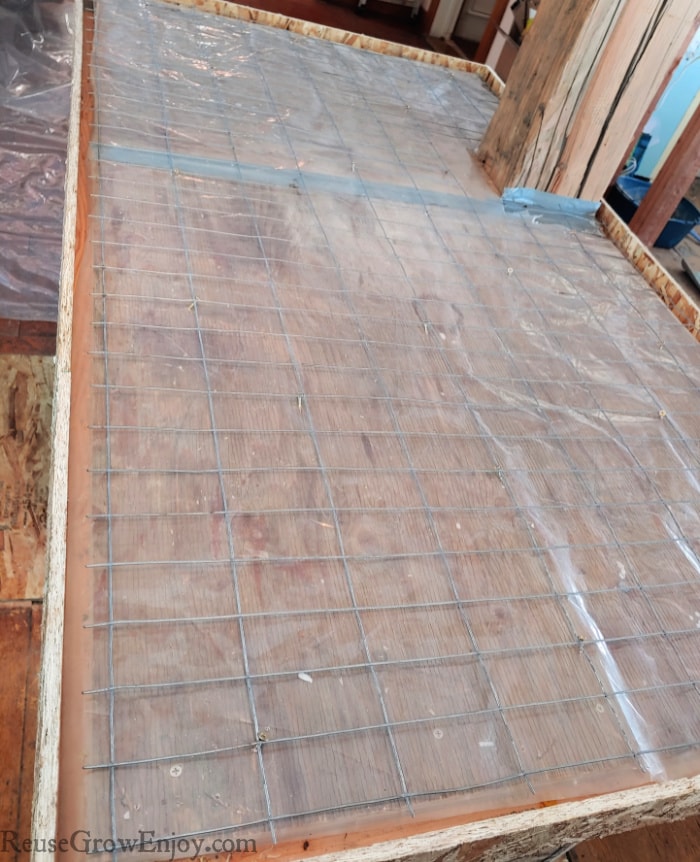
The next step is to line the tops with a plastic sheet. Cut it to fit inside the edging of the wood frame. Then, take your wire and do the same.
This part is a little tedious, but it really helps to strengthen and support the concrete. Once you have the wire cut and laid into the frame, screw it down every few inches so that the wire stays about ½” up from the plywood.
This keeps it centered on your counter and helps it not raise up too high so that you won’t see it in the top finished part.
Mixing & Pouring Concrete:
Now comes the fun part – Mixing the concrete and pouring it.
We used 2 buckets for this part, one for mixing the concrete in and one to keep the water in. This helps minimize going back and forth to a sink, and likely your sink may be blocked during this or covered up.
We used a handled bowl to scoop the water into the bucket of the dry mix as needed, mixed it right there in the same room, and just kept mixing small amounts at a time, so that we didn’t over-do it, or have some set up too fast.
You may also want to put plastic down on the floor to avoid any mess and clean up.
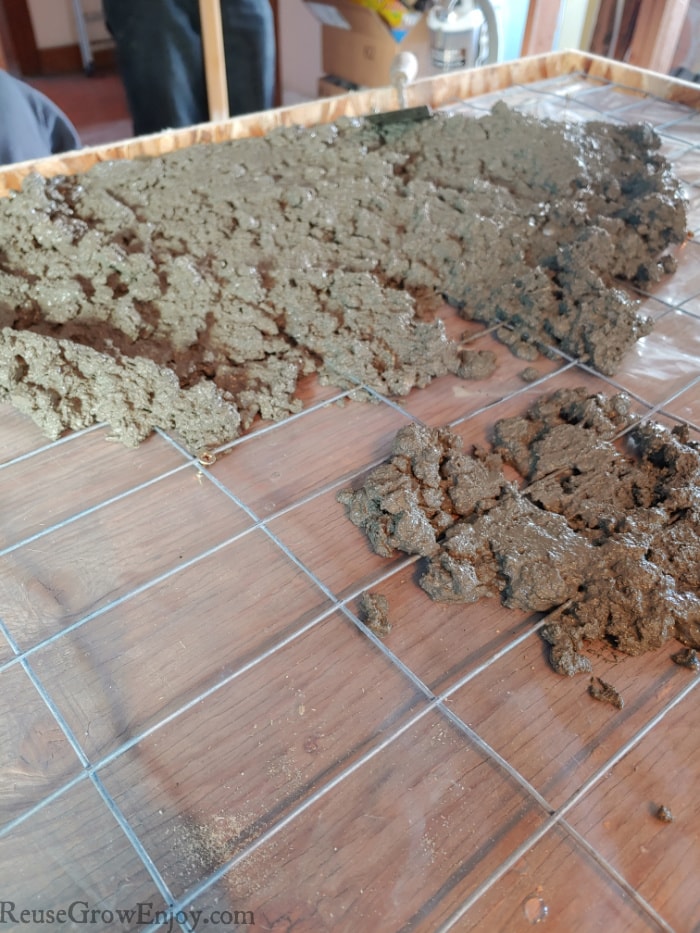
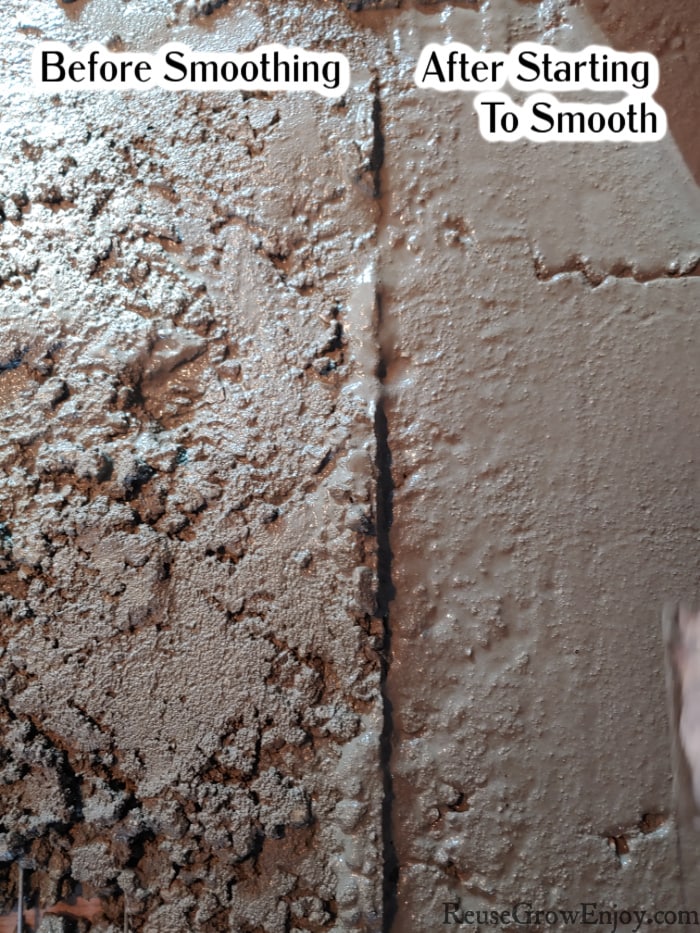
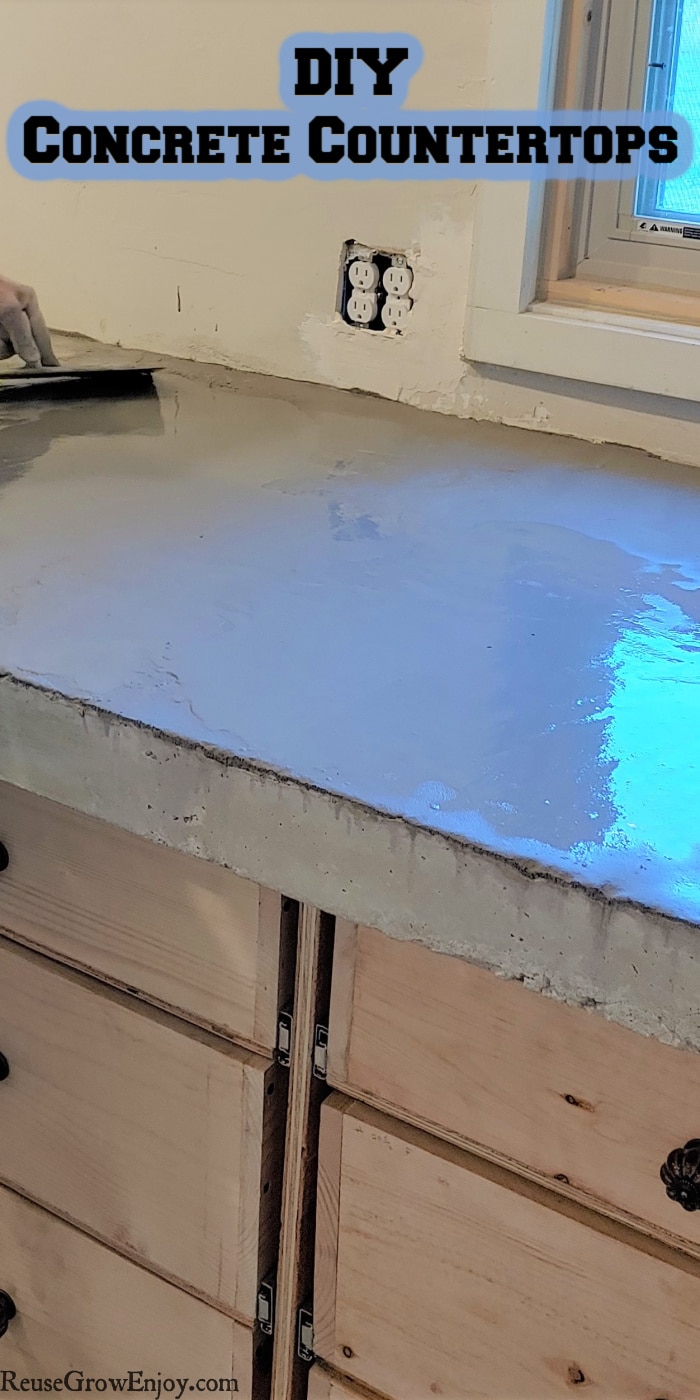
As you pour the concrete it will be lumpy and seem like there is no way it will end up as a smooth countertop, but don’t fret, it will.
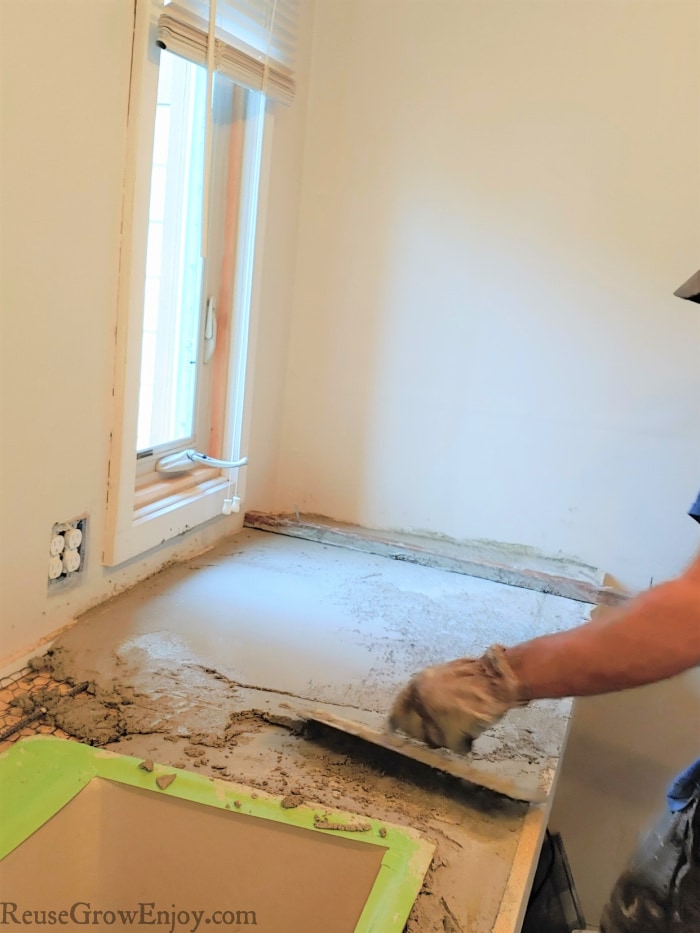
The trick is to keep using the trowel to smooth it out and get the excess bubbles out of it too.
You will see small pebbles rise to the surface as well as bubbles and you will want to push those back down or remove them, and then smooth it out.
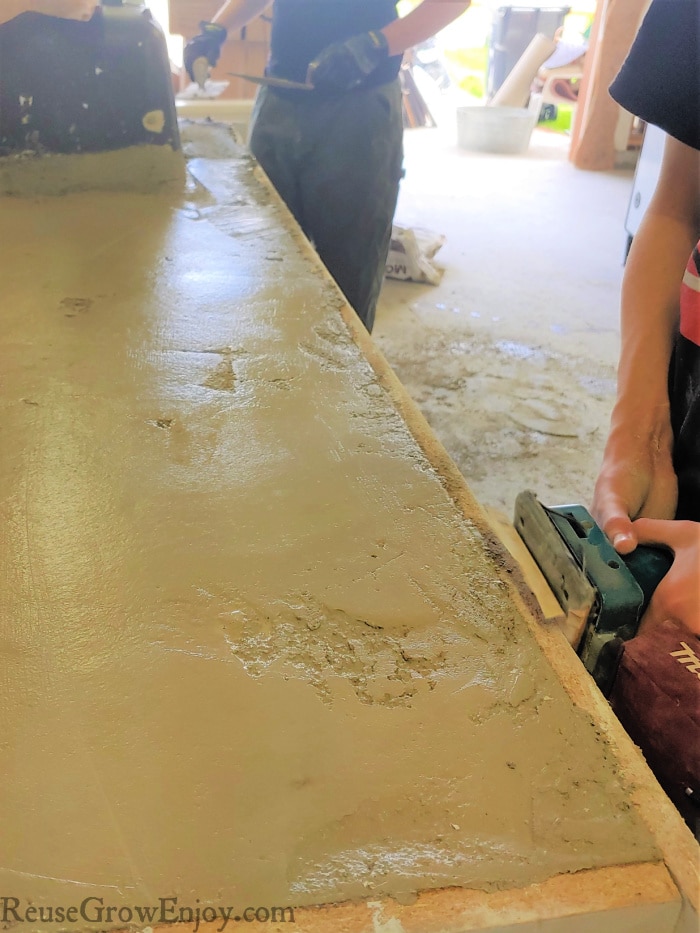
The bubbling goes on a bit, and we used the palm sander once the concrete was filled in well.
Go around the outside edges of the counter (over the wood area) with the sander, and watch as it vibrates the excess bubbles to the top surface.
This is a big help. Once you’ve done that, go back and smooth it out again so that you don’t have the little bubble outlines in the finish.
Around the lip edge, you may have some concrete crack or gap because it is falling down in and filling in space which is what you want it to do.
But you will likely need to add more concrete there to fill in.
The lip edge will have a slightly rougher look, and it just adds character. We just made sure the top was filled in and smooth.
You will see the water rise to the top, along with some light oils, and this normal. You can remove some of that if you feel it is too much. But we just smoothed it back out there to let it help work with the concrete.
Curing & Drying:
Once you have the concrete smoothed out to your satisfaction, cover it with plastic. Leave it this way for 2 days and check it periodically for cracking that may be starting as it dries or for too dry of spots.
Spritz those drier spots with water and smooth out the ones that are starting to crack with light pressure.
It is the most important part of the process to keep the concrete drying slowly and not leave it uncovered. It will crack and look messy if you skip this step.
The outer and top parts of the counter tend to dry faster and the middle takes longer. So you will need to watch it over a few days. Then on the 3rd day, take off the plastic and let it dry all day.
Then carefully remove the frame.
We did our counters in steps as far as the finishing parts. Because we were living in the house and needed to be able to use them as much as we could, which was challenging but worked out okay.
On the weekends we would apply the product and start the drying process. We did use the counter in the raw concrete form for a few days with each counter and it was fine.
You just don’t want to stain it if you plan to use it as its natural color.
Applying Leveler & Sealer:
The next thing you will need to apply is the concrete leveler. Just apply it as directed and let it dry thoroughly. We applied it to be about 1/8” thick.
This took about a full day or two total.
Then the last step is to apply the epoxy finish. This is made to use on concrete in general but is recommended for garage floors too. So you know it will hold up well and withstand the abuse your kitchen counters take.
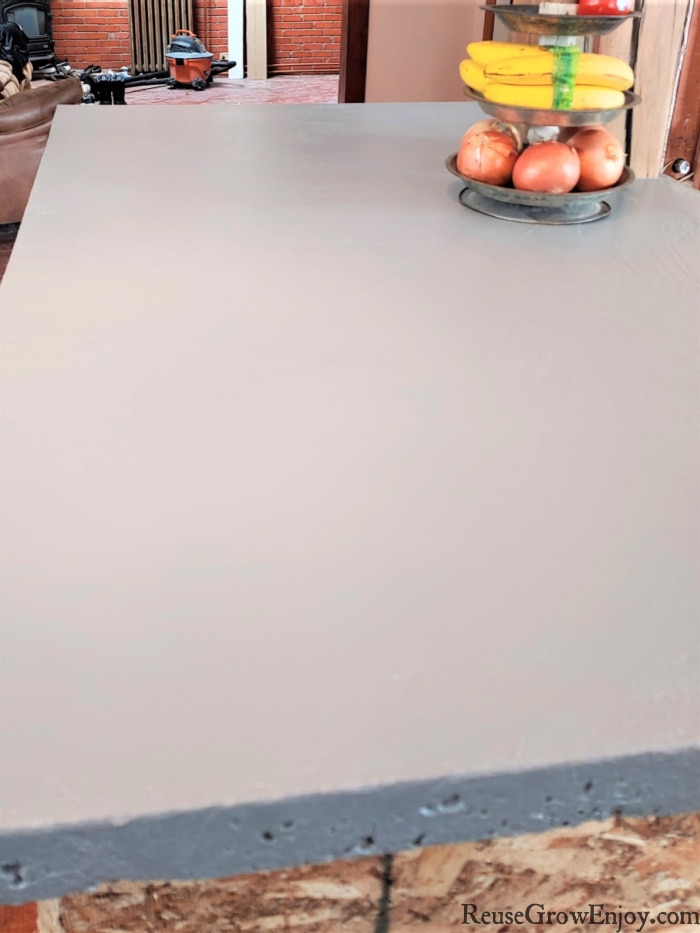
It comes in multiple colors, but we chose a dark gray for ours. We have done a deep green one before too which came out nice, but it was a few years back.
Brush off the countertop well before applying and be sure there is no dust or debris on it. The package will explain how to apply too of course. But we basically used a wide brush to paint it on. We did about 3 to 4 coats total, letting each one dry in between applying.
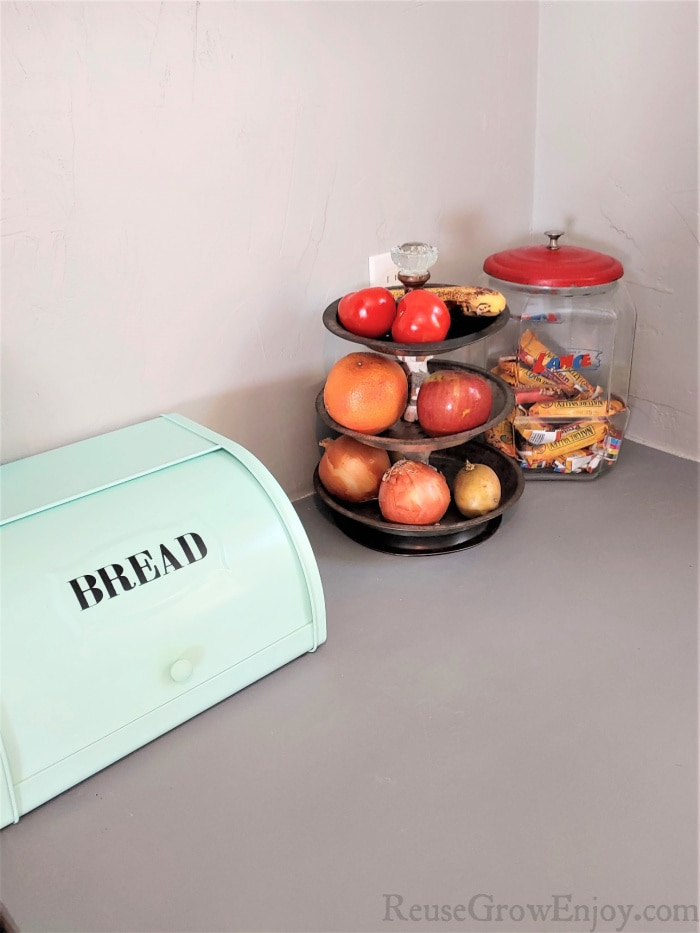
Once the epoxy coating is dry, you are all set to use your counters as you normally would. I spray mine with natural cleaners and don’t use any harsh cleanser or anything. So I can’t attest to how they hold up with those, but overall the counters look great.
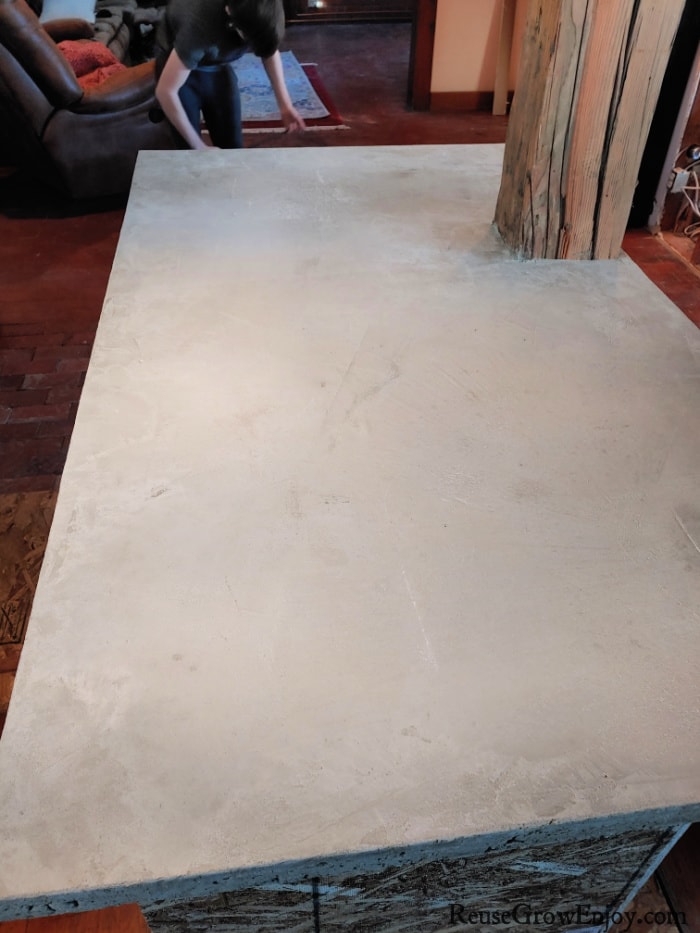
The counters have a clean, smooth style. But with a little character with the concrete edging and lines here and there.
You can see a few swipe marks from the trowel in a couple of places. But I like that you can tell what you are looking at, and aren’t wondering what it is made of.
You don’t see any of those marks from a distance at all and it just looks totally smooth and clean.


Leave a Reply