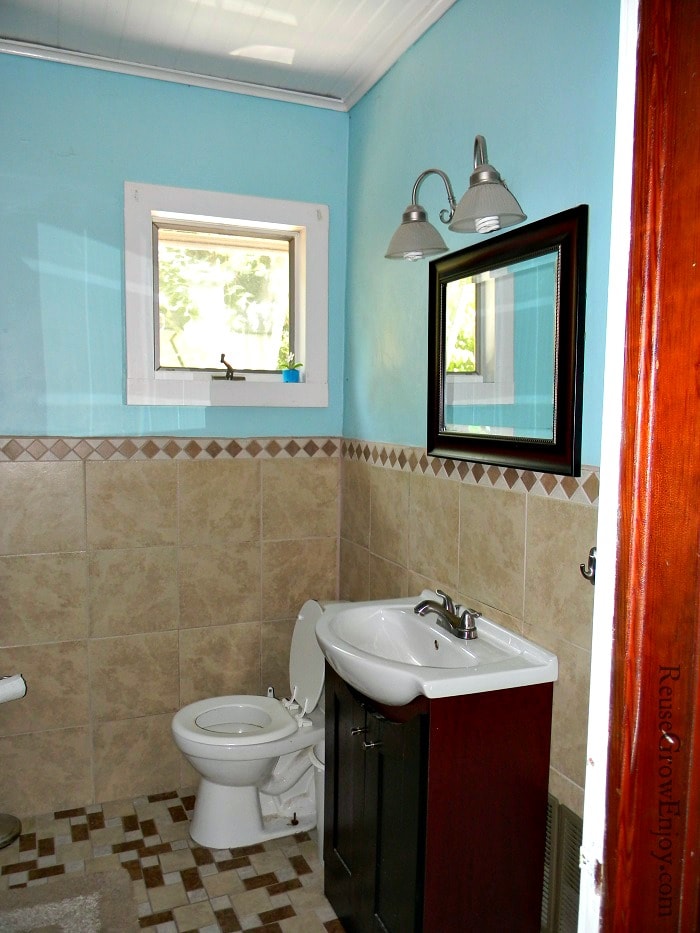
Frugal DIY Bathroom Remodel
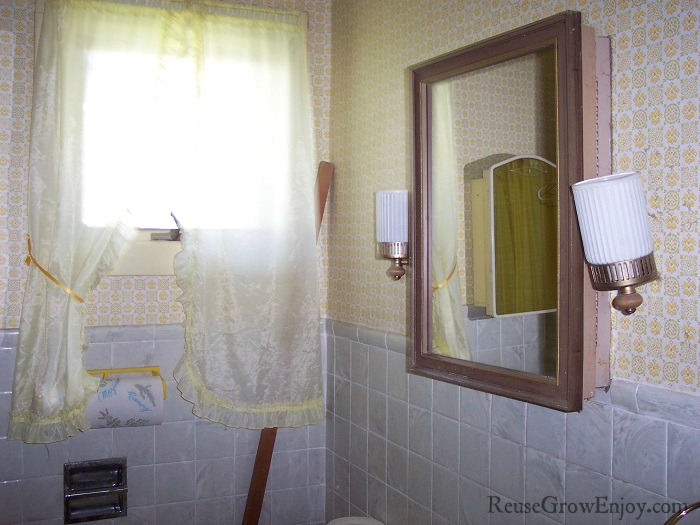
Buying an older home can save you so much money and I just love they extra character they have over new homes. Our first home was built in 1930’s and we saved a ton by buying that old home. The frame and everything structure wise was in good shape, but it needed some help in the facelift area. One of the things we did was a bathroom remodel. Boy did it need it!
However because we wanted to pay our house off early, we sunk most of our money we made into doing just that. We lived on a tight budget and did not want to spend money on paying someone for a bathroom remodel.
We just lived with it for months as it did still function. However one day the sink vanity collapsed and we knew it was time we had to do something. So we set a $200 budget and figured if we did all the work that should cover the things needed for the bathroom remodel.
By using the tips I am going to share with you, I was able to redo the bathroom and we came in under budget by about $25!
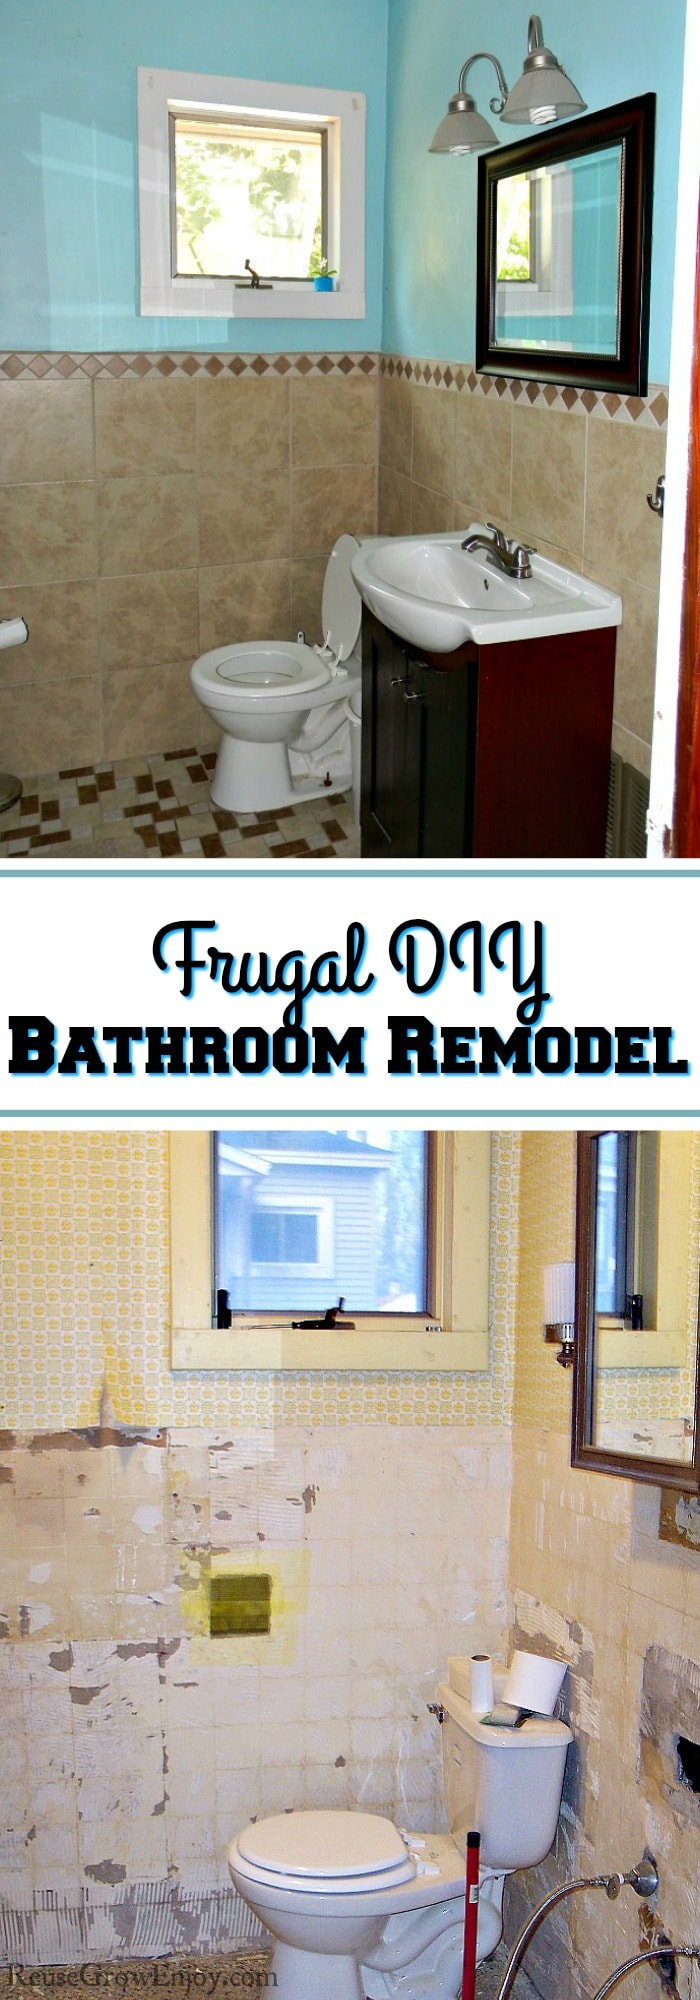
Note: I wish I would have taken more photos back when we did this. But I just starting into blogging back then and did not think to take step by step photos. I was surprised the other day when looking through pictures I had some before and after, so figured I would share with you all what I did.
How To Save When Doing A Bathroom Remodel:
The first thing you want to do is set down and make a list of the things you will need. You will also need to measure the bathroom and figure out how much tile and other items you will need.
After you do that it is time to start shopping. Be sure to compare ads and see who has the best deal on what items. Another than the ads, be sure to check out the store’s clearance and scratch and dent sections. You would be shocked how much you can stretch your budget when you do. Like our bathroom sink/vanity, we found in the clearance open box section at Lowe’s for $60! It normally sold for $159.
Another great way to save is to shop in discount stores. Shopping at stores like Big Lots, Ollie’s, Mr. Seconds or any discount store you may have in your area can save a ton. A lot of times they have discontinued items as a fraction of the price.
Saving On Tile:
When it came to buying my tile I wanted to do a pattern on the floor and I need little tiles. However, when I priced it, the pre cute tile would have taken a large chunk of my budget and I was not finished with buying the other items I needed. So I priced what it would be to buy the tile in 12×12 tiles and then hand cut them. Even with buying a tile cutter (like this one here) I was able to get all the tile for about one fifth the price including the cutter! So hard work and hand cutting was what I did.
I spent hours on a tarp day after day until I had all the pieces cut. Those are the ones you see on the floor and on the border on the wall. Yes, it took me a while of labor, but I saved so much!
This was another item I found on clearance at Lowe’s for around $0.25 per 12×12 tile.
Now To The DIY Remodel:
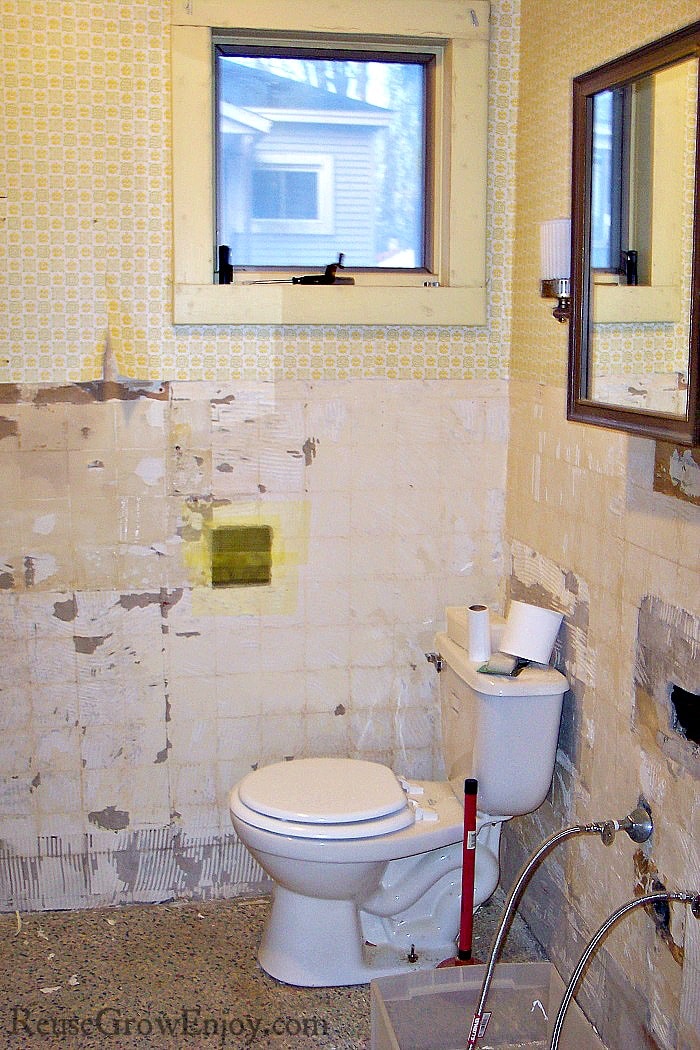
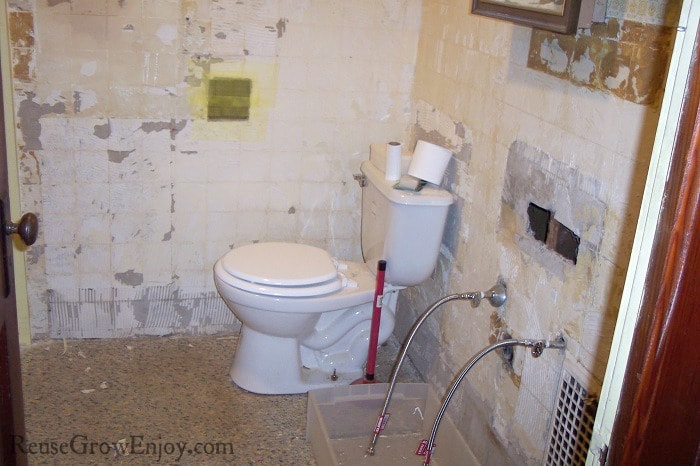
Now that I have shared some tips on how to get the best deals to stretch that budget, it is time to do the work. The first thing you need to do to start the bathroom remodel is start stripping away all the old. For me, it was removing the sink and vanity. If you have to do this too, be sure you turn off the water before you do so. The remodel is a mess enough as it is, no need to add tons of water to it.
After that we removed all the fake plastic tiles from the walls. These had been glued, taped so much so it was a piece of cake to pop off.
The next step was removing all the old wallpaper. One of the best ways I found for doing this is mixing a 3 to 1 mix of vinegar and water in a spray bottle (3 parts vinegar and one part water) then simply peel a little paper and spray the mix to it and let it sit for a few minutes. You can also take and scratch up the front side of the paper with a scoring tool and then spray the paper. It helps to loosen up the glue making it easier to remove.
The last thing we had to do was remove the lights and the medicine cabinet. This is another step that if you are doing, turn the power off before messing with the lights to the wires.
Thankfully for us we did not have to get a new toilet or tub. Both of those worked and looked fine so we did not have to buy those. I am sure if we did, we would not have been able to stick to that low of a budget.
Installing Tile On Walls And Floor:
I had never installed tile before this. I had seen it done on TV and YouTube (If you have never done it before either YouTube tile videos are a life saver!)
Before you start you have to make sure you have a solid subfloor down. Mine was an old style flooring and was very solid and level so I just went over the top of it. If you do not have a solid level subfloor you will need to put one down before doing the tile or your tile will crack when walked on.
To start I put thin-set mortar on the walls a few tile amounts at a time, then made grooves in it with the back of the trowel. Next, I put a tile on the wall and pushed on it to set it in the mortar. Then put tile spacers between each tile. This is so it stays even for when you do your grout.
Then I did the same thing with the floor. Then allow both to fully dry (about 24 hours).
After it is dry, it is time to do the grout. Remove all the spacers from the tiles. Mix the grout using the directions on the packaging. Then using a grout float fill all the cracks with the grout. Yes, this is a very messy step.
After you have filled all the cracks, take a wet sponge and wipe down all the tiles to remove the grout that got on the tiles. Be sure not to push the sponge down in the cracks and you do not want to remove the grout from the cracks. This will take several times of wiping down to remove it all. You have to be sure to get it all now because after it sets it will be hard to remove and leave the tile with a haze. Allow it to set for 24 hours before you walk on it.
Bathroom Remodel Installing Mirror, Lights And Sink:
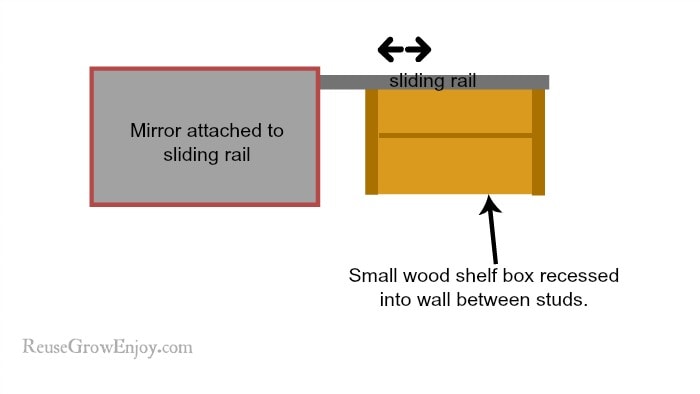
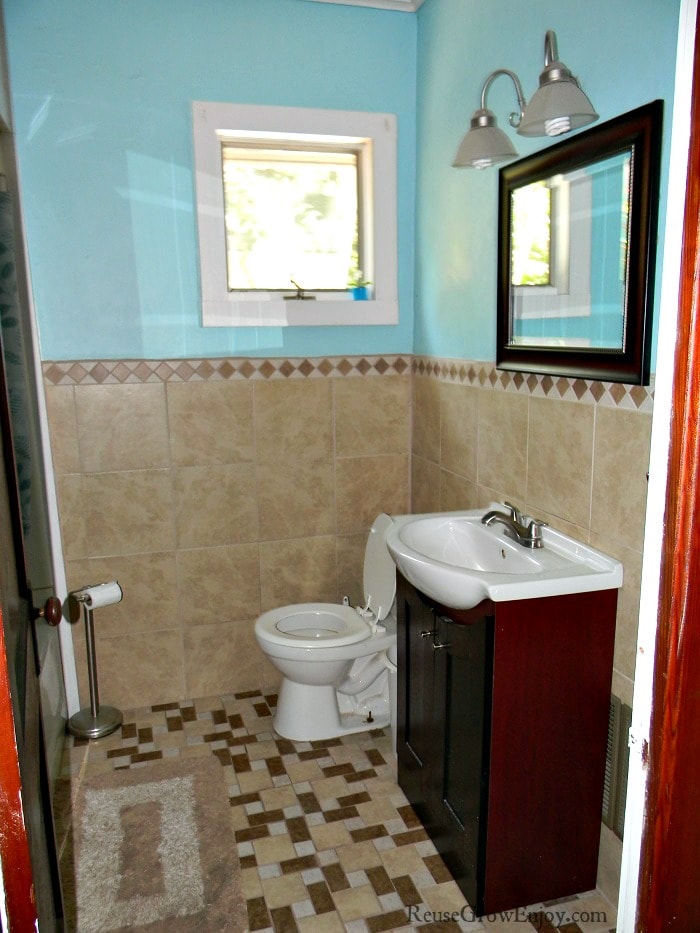
This was a small bathroom so a medicine cabinet was needed however I hate the look of them sticking out from the wall. So I decided to recess it into the wall. I cut a hole in the wall above where the sink would be going. Then I made a small wood box/shelf (kinda like a mini bookshelf) that would fit between the studs in the wall. I anchored it to the studs so that it stuck out of the wall by only about 1/8 of an inch. I could not make it flush as I needed to attach the sliding mirror.
After I had that part in the wall, I used a drawer slide rail to attach to the mirror. I attached the rail to the mirror and then the other end to the top of the wood box. You may need a second set of hands to help with this part.
Now just above the mirror find the center of the mirror and then install the light. The next thing we did was install the vanity. The vanity we got the sink was already attached. We simply just had to anchor it to the wall. Then put the faucet on. Then we used flex pipe for an easy install of the water lines.
The last step was painting the wall above the tile. That was it! The job was finished!
If you found this post on a DIY bathroom remodel helpful and are looking for more tips for around the house, here are some other posts to check out.
- How To Change A Outlet
- DIY Water Heater Repair – How To Change Heating Elements
- How To Patch Drywall
- How To Flush Hot Water Heater – Electric Hot Water Heater


Stella says
Looks great! Anyone would think a perfesional did the work. Love the sliding merrior.
Martha S. says
Bathroom Remodeling one of the toughest job I ever did. I appreciate you sharing these unique bathroom remodeling Ideas. I shared this on Facebook and my followers really enjoyed it.Keep up the amazing work! ??.
Reuse Grow Enjoy says
Thanks for sharing Martha!