There is nothing better for the garden then some worm compost. If you are wanting to start your own worm composting bin, I will show you step by step how easy it is!
DIY Worm Composting Bin – Plus Worm Compost Tips
If you are a gardener you may have bought bags of worm castings in the past to add to your garden soil. While it is such a great garden additive, it can be costly to buy. Making your own worm composting bin is not only budget-friendly, but it is also super easy!
Not only am I going to show you step by step how to make one, but I am also going to go over some worm compost tips. This just may be one of the easiest pets/workers you will ever have.
Why You Should You Have A Worm Farm (aka Vermicomposting):
First, let’s start off with why you should have a worm farm. Yes, the main reason to have a worm farm is to get the worm castings to add to the garden soil. As it adds so many valuable nutrients to help us grow happy healthy plants without added chemicals, but it is not the only reason.
Having your own worm composting bin (aka worm farm) is a great way to use up scraps from the kitchen. No, you can’t use all scraps but you can use all those vegetable scraps you would normally toss into the trash.
You can also cut down on household trash, even more, buy composting other things you would normally toss out too. Such as paper, cardboard, paper egg cartons, tp tubes and more!
By having a worm farm you will also be raising your own worms! You can either use them to start more bins, add worms right to the garden soil or even sell them.
Some love the idea of selling them as it is a nice way to add a little extra income to the household.
How To Make A Worm Composting Bin:
While there are lots of different worm bins on the market that you can buy already made, some can be a little costly. Knowing how to make your own worm composting bin is super handy when you are on a tight budget. Plus they work just as well.
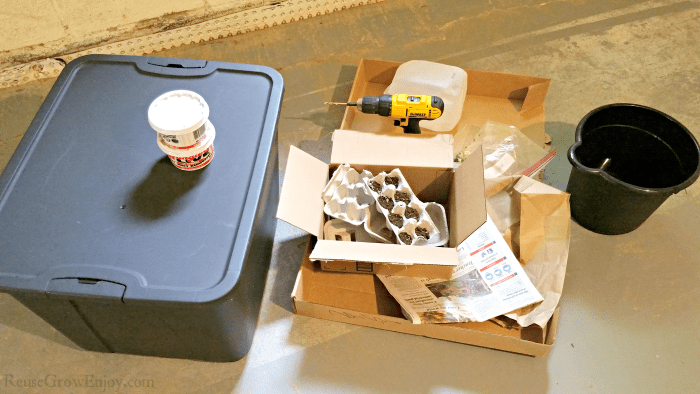
Supplies Needed:
- Dark Plastic Tote
- Drill With 1/4 Inch Drill Bit
- Plastic Container For Drip Tray (I used a bottom of a milk jug)
- Water
- Starter Material (newspaper, cardboard, paper egg cartons)
- Vegetable Scraps
- Worms (try so start with 120 worms or more)
- Few small handfuls of soil, sand or ground eggshells. (grit is needed to aid in the worm digestion)
- 2 Blocks, Bricks or Boards
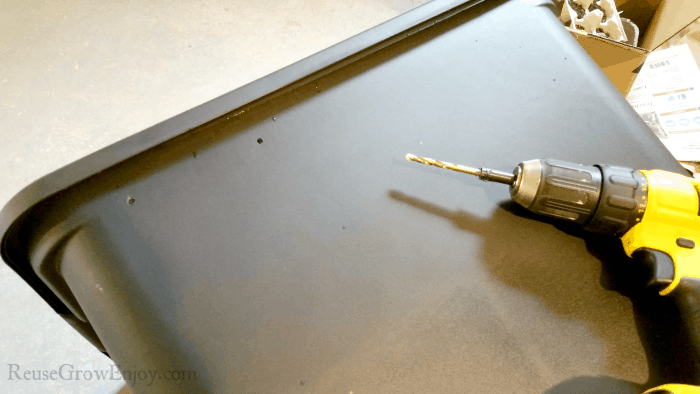
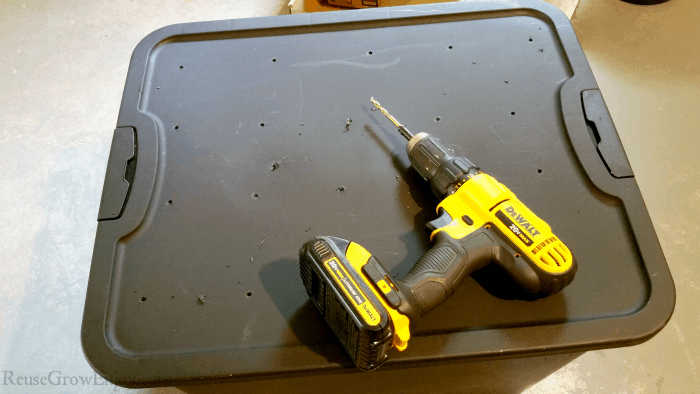
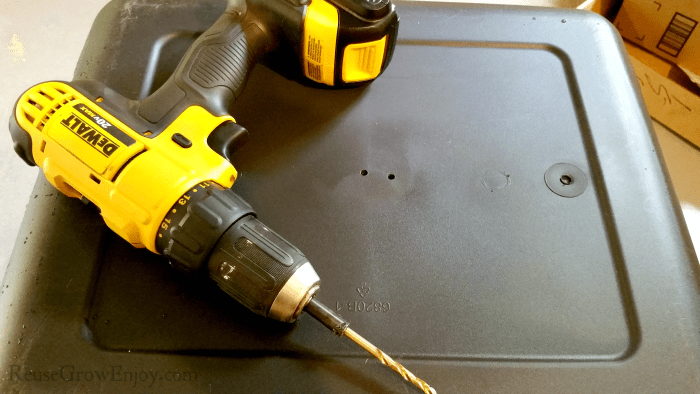
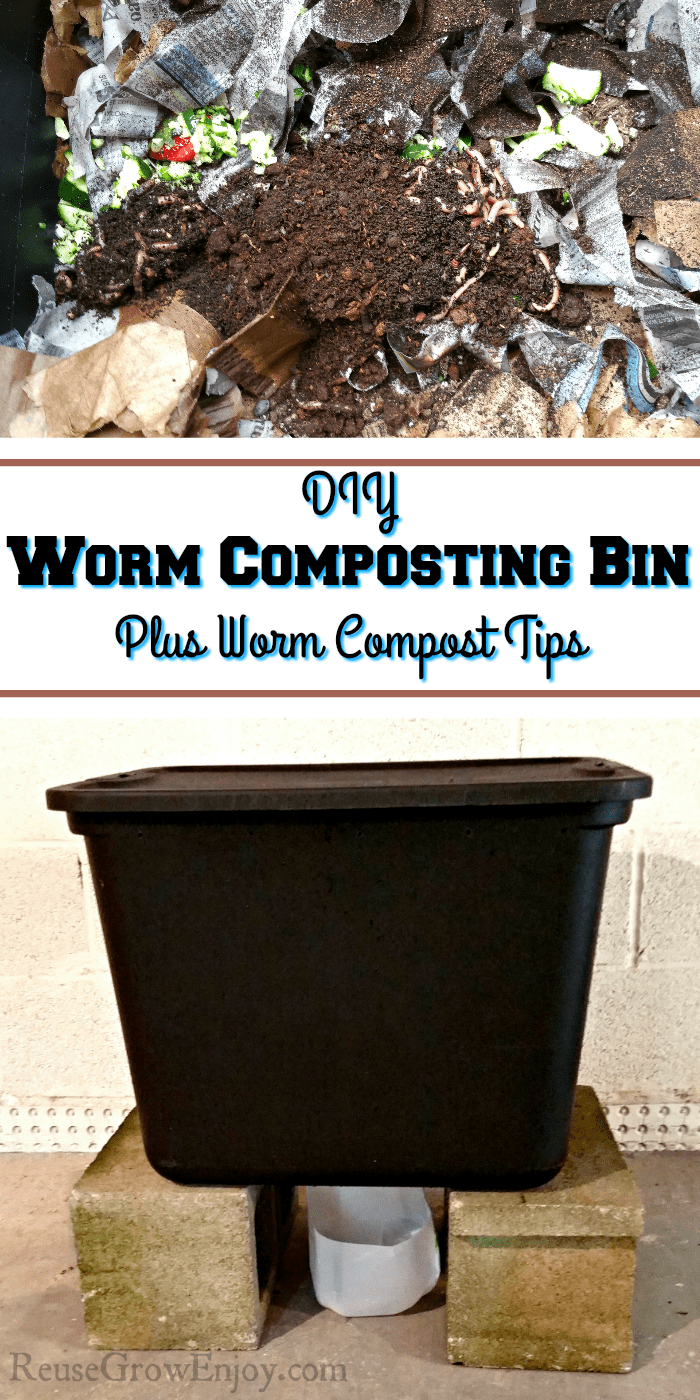
First thing you want to do is drill holes around the top of the plastic tote. I drilled them all the way around about three inches from each other.
Then drill a bunch of holes in the top as well. Spacing about the same as you did on the sides of the tote.
Then drill three holes in the bottom of the tote (from the inside of the tote). You want those holes to be in a small bunch in the bottom center of the tote as they will be for draining.
After you have drilled all the holes, give the tote a good wash out to make sure there are no plastic pieces in there.
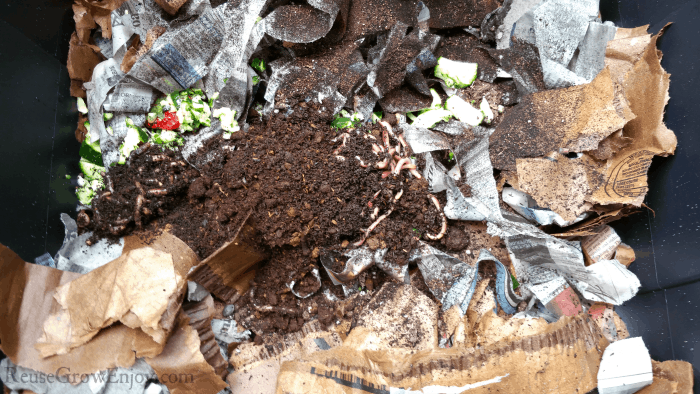
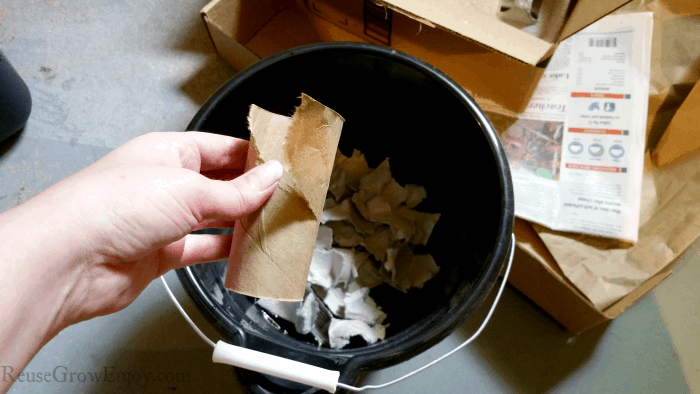
Rip up all the newspaper and cardboard you are using into pieces. Then soak them in water. When you remove from the water ring out as much water as you can. You want it to be moist but not soaking wet as that will make the worms not be able to get enough air.
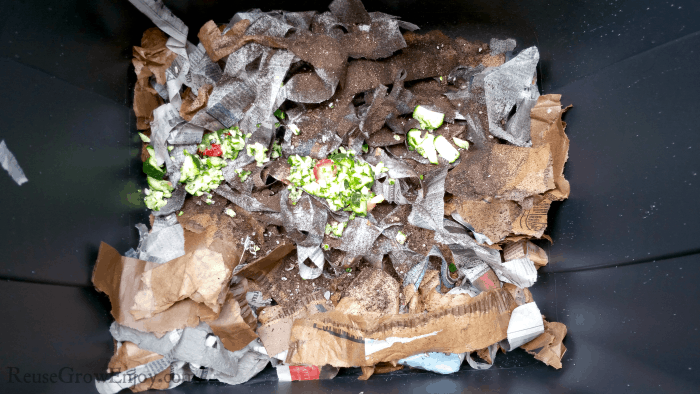
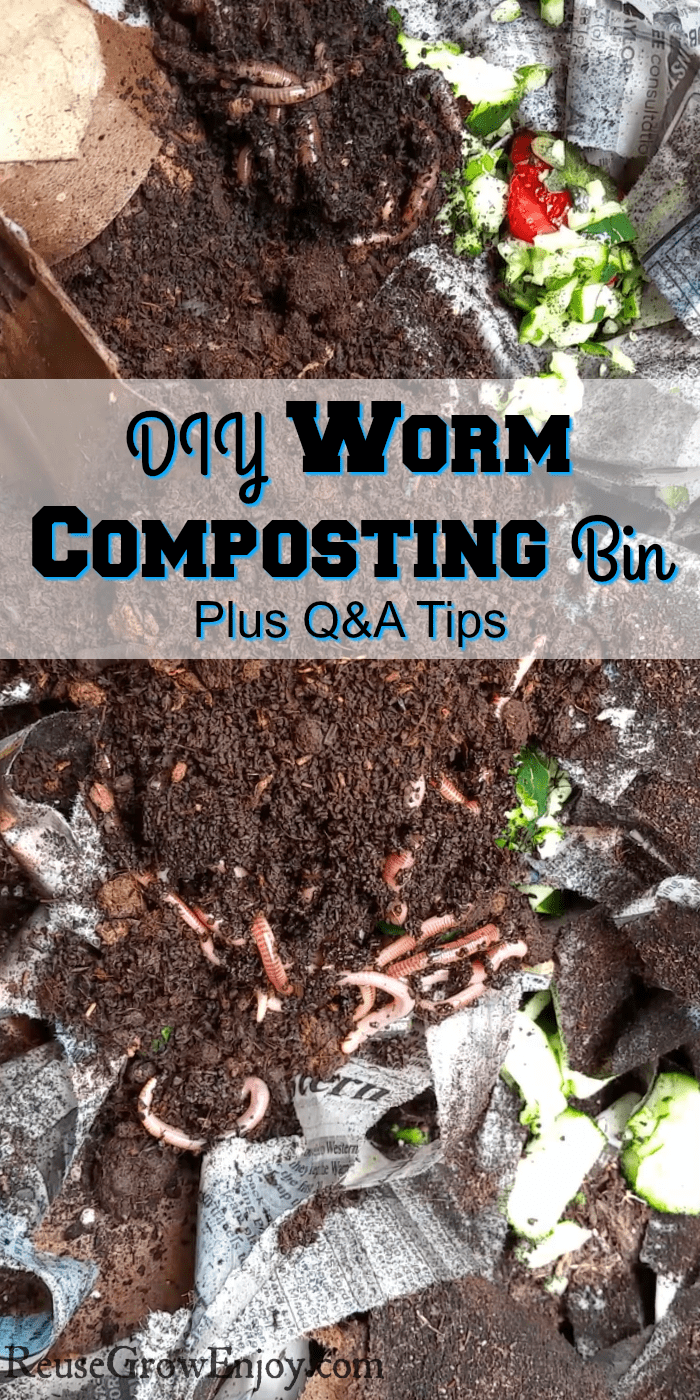
Place 3/4 of the moist material into the tote. Sprinkle dirt/sand over it. Then add a small handful of vegetable scraps over it.
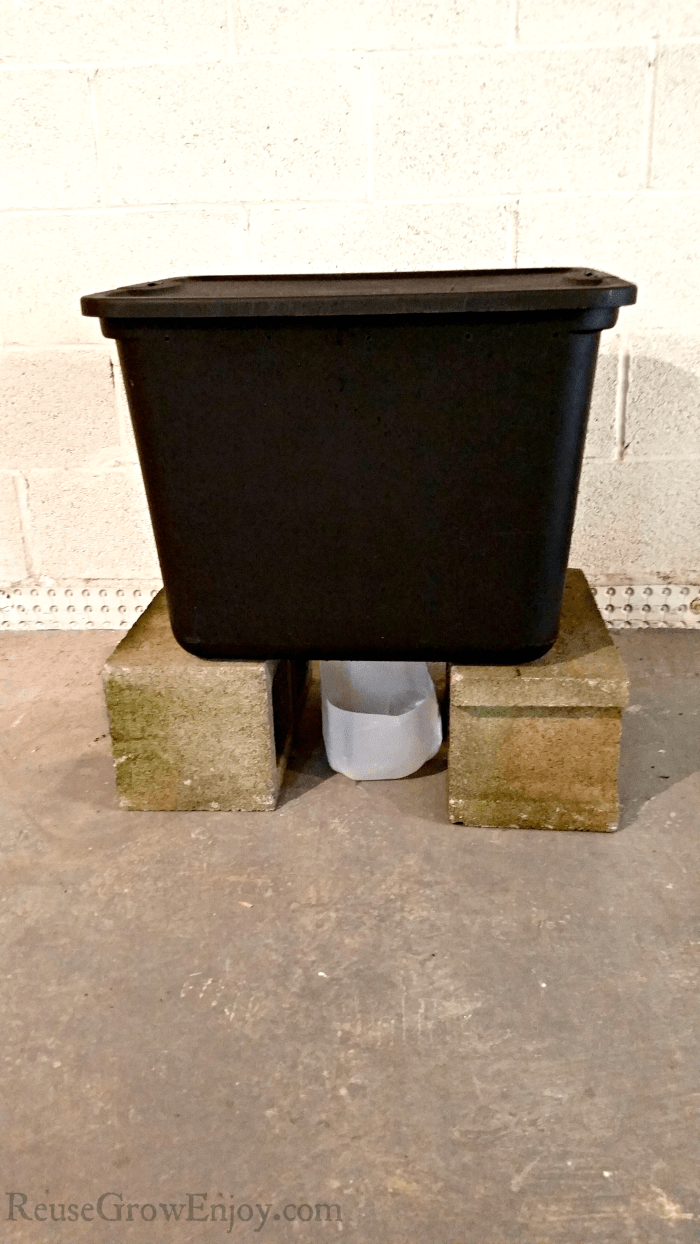
Now dump your worms on top then cover them with the rest of the moist paper. Set the tote on two blocks or some other item to lift it slightly off the ground.
Place the drip tray (I used a cut off milk jug for mine) under the center bottom of the tote where you drilled the holes. This will collect any compost tea and you can use it in the garden as well.
How To Care For The Worms:
Worms are super easy to care for as they do not need to be fed every day. They only need to be fed small amounts about once per week.
Each week, open the tote carefully did down a little in a few spots and add a small handful of scraps to each of those spots and then recover. By digging down it helps to cut down on flies and other bugs.
You do not want to overfeed your worms. You only want to give them enough that they can eat in a week. If starting with a small number of worms (like 160), you only need a small handful. That is about the amount of peelings you would get from a large cucumber to give you an idea.
As your worms increase, you will need to add to the amount each week.
You do want to try and mix it up with the things you give them. Try to add a verity of items every time you feed them.
Another important part of caring for your worms is the temperature, light, and sound. They do not like light so it is best to keep in a darker area. This also helps the tote from getting too hot. We don’t want to cook our worms in the heat.
You also need to be mindful in the winter months. If the bin freezes, it will kill the worms. Try to keep the bin in an area that stays above 45 degrees and below 80. I keep mine in my basement and it works out perfectly.
Worms also do not like lots of noise or vibrations. So try and place in them in a low traffic area.
If you notice the bin getting really dry, use a spray bottle full of water to give it a few sprays. You want it to be damp but not soaking.
If you notice the worms climbing the sides of the tote, chances are it is to wet and they can’t get enough air. Try leaving the top off for a few hours to help dry it out some.
What You Put In A Worm Compost & How To Store Before Adding:
You can really add tons of things to a worm compost bin. You just have to keep in mind some things that can never be added. Below are some items listed that can and can not be added and how often.
NEVER Add These Items To Your Bin:
- Anything Plastic
- Glass
- Meat
- Dairy
- Cooked Foods (other than occasional cookie or bread)
- Oils
Things You CAN Add To Your Bin:
- Fruit Scraps (try to avoid orange rinds and other citrus fruits if added, only tiny amounts)
- Raw Vegetables (add onions and broccoli sparingly as they have a strong smell)
- Paper (avoid glossy paper or plastic coating paper)
- Cardboard
- Paper Egg Cartons
- TP Tubes
- Paper Towel Tubes
- Ground Egg Shells
- Coffee Grounds (no more than one time per month)
I have found it is best and speeds up the composting process if I run the scraps through a food processor. If you don’t have one, just chopping it up into small pieces will also work. This helps to make it into smaller pieces that the worms can consume faster.
Sometimes you may find yourself with some great kitchen goodies to add to your bin but it is not time to feed them yet. I like to store mine in a large Ziploc bag or plastic coffee container and then store it in the freezer. That way you can save/store it so that it is not wasted and you don’t have to worry about it rotting.
By freezing it, you also hold that moister in and helps with keeping the bin moist when you add the scraps.
How To Harvest Castings:
When it comes time to harvest your worm castings there are a few different ways it can be done. First off, you need to know when to harvest.
When to harvest will depend on how many worms you are working with. Typically you should have a harvestable amount every 3- 6 months.
However, if you started with a small number of worms it may be a little longer for the first harvest. But will lessen as you get more worms. Worms can reproduce quickly depending on the type you use.
For the most common and recommend worm the Red Wigglers, they can double in about 3- 6 months. So if you started with say 160 worms, in as little as 3 months you may have 320 worms.
When you want to harvest the castings, from your homemade worm composting bin you figure out which way works best for you.
Option 1:
The first way is to lay out a large piece of plastic or tarp. Then dump the bin on to the plastic. Slowly go through and pick out the worms and add them to another ready to go compost bin.
This method works but is a little time-consuming.
Option 2:
Stop feeding the worms for about two weeks. Then push all of the contents to one side of the bin. Be careful not to harm the worms.
Place a small handful of food on the empty side of the bin and cover with fresh bedding. Keep only adding food to that same side for the next two weeks.
After a few weeks, all of the worms should migrate to that new food spot and you can now remove the old compost side from the bin. This is pretty much the way the store-bought compost bins work, they just make them migrate up to the next tray.
Either option you choose, keep in mind that you may not be able to save every worm and some may end up in your castings. But that is ok as they can still do their thing and the garden. As fast as they reproduce, you should not even notice the loss as long as you keep it to a minimum.
You can also harvest the compost tea at any time. That is the liquid that drips into the tray under your bin. It can be mixed with water and added right to the garden. If you keep your bin pretty much spot on with the right conditions, you should not have too much tea/liquid that drains out.
Solutions To Common Problems:
Q. How To Stop Worms Climbing Out/Up Container?
A. This can be due to a few issues. First is from lack of air. Make sure no vent holes are covered and that you have enough holes.
It can also be from to much water in the bin. Try leaving the top off for a few hours and adding a little drier paper/bedding to the bin to absorb some of the moisture.
You can also just leave the top off and place a piece of cloth or paper flat over the bedding. That way they can still get air but it will allow some light in which will keep them down in the bedding to avoid the light.
Q. Why Are There Fruit Flies All Around & How To Get Rid Of Them?
A. Fruit flies normally happen if you are feeding more then what the worms can get within a week. As the food will start to rot on its own and will attract flies. It could be also from just laying the food right on top and not burying it.
Try feeding less if you think you are feeding to much. Or make sure you fully burry the food. To catch/kill the flies you already have a fruit fly trap works wonders.
Q. Can I Just Dig Up Worms From The Yard To Use?
A. No. While they may work slightly they do not work as well for composting. The best and most used for worm composting/Vermicomposting are Red Wigglers (aka red worms). You can buy online at many places such as Amazon here, or you can get at most bait shops.
If starting small a bait shop or even the sports section at Walmart is your best and lowest priced option.
Q. I Don’t See Any Worms In My Bin, Where Did They Go?
A. If you don’t see your worms it is normally because they like to go deep into the bedding to lay eggs or to just hang out. Try carefully digging down and see if you see any movement.
If not, you may have not had the right conditions and the worms have deceased. If that is the case, they will just decay into the compost and will be added into the garden soil. Try and correct the conditions and add some new worms.
Q. My Bin Smells So Bad! What Do I Do?
A. While the bin can have a slight odor, if kept properly, you should hardly notice it. If you are having strong odors coming from yours you need to check a few things. First, make sure you are not adding anything from the NO list to the bin. Also, make sure you are burying the food when you add it and not feeding more then the worms can eat within a week. If you notice there are leftovers when you go to feed them, then you are giving them to much and need to cut back.
Q. What Do I Do If My Worm Compost Is Too Dry?
A. You can add a few sprays of water with a water bottle to the worm composting bin. It also helps if you freeze the scraps before adding them. That will help to add moister to the bin.
Other posts you may like.
- Potato Tower Box – How To Make And Grow In A Potato Tower Box
- Tips On How To Vacation Proof Your Garden
- What To Compost
- Best Natural Fertilizer For Your Garden


Olga M. says
Can I use machine shredder paper?
Reuse Grow Enjoy says
Yes, just make sure it is not glossy and that it has no staples or plastic in it. This is what I do with most of my mail and junk mail.